A Beginner's Guide to Tilt Shift Photography Part 2
20 96 Share TweetIf you want some crazy tilt to your photography you have two choices – spend a fortune on an expensive professional lens or build your own. It’s easy, honest!
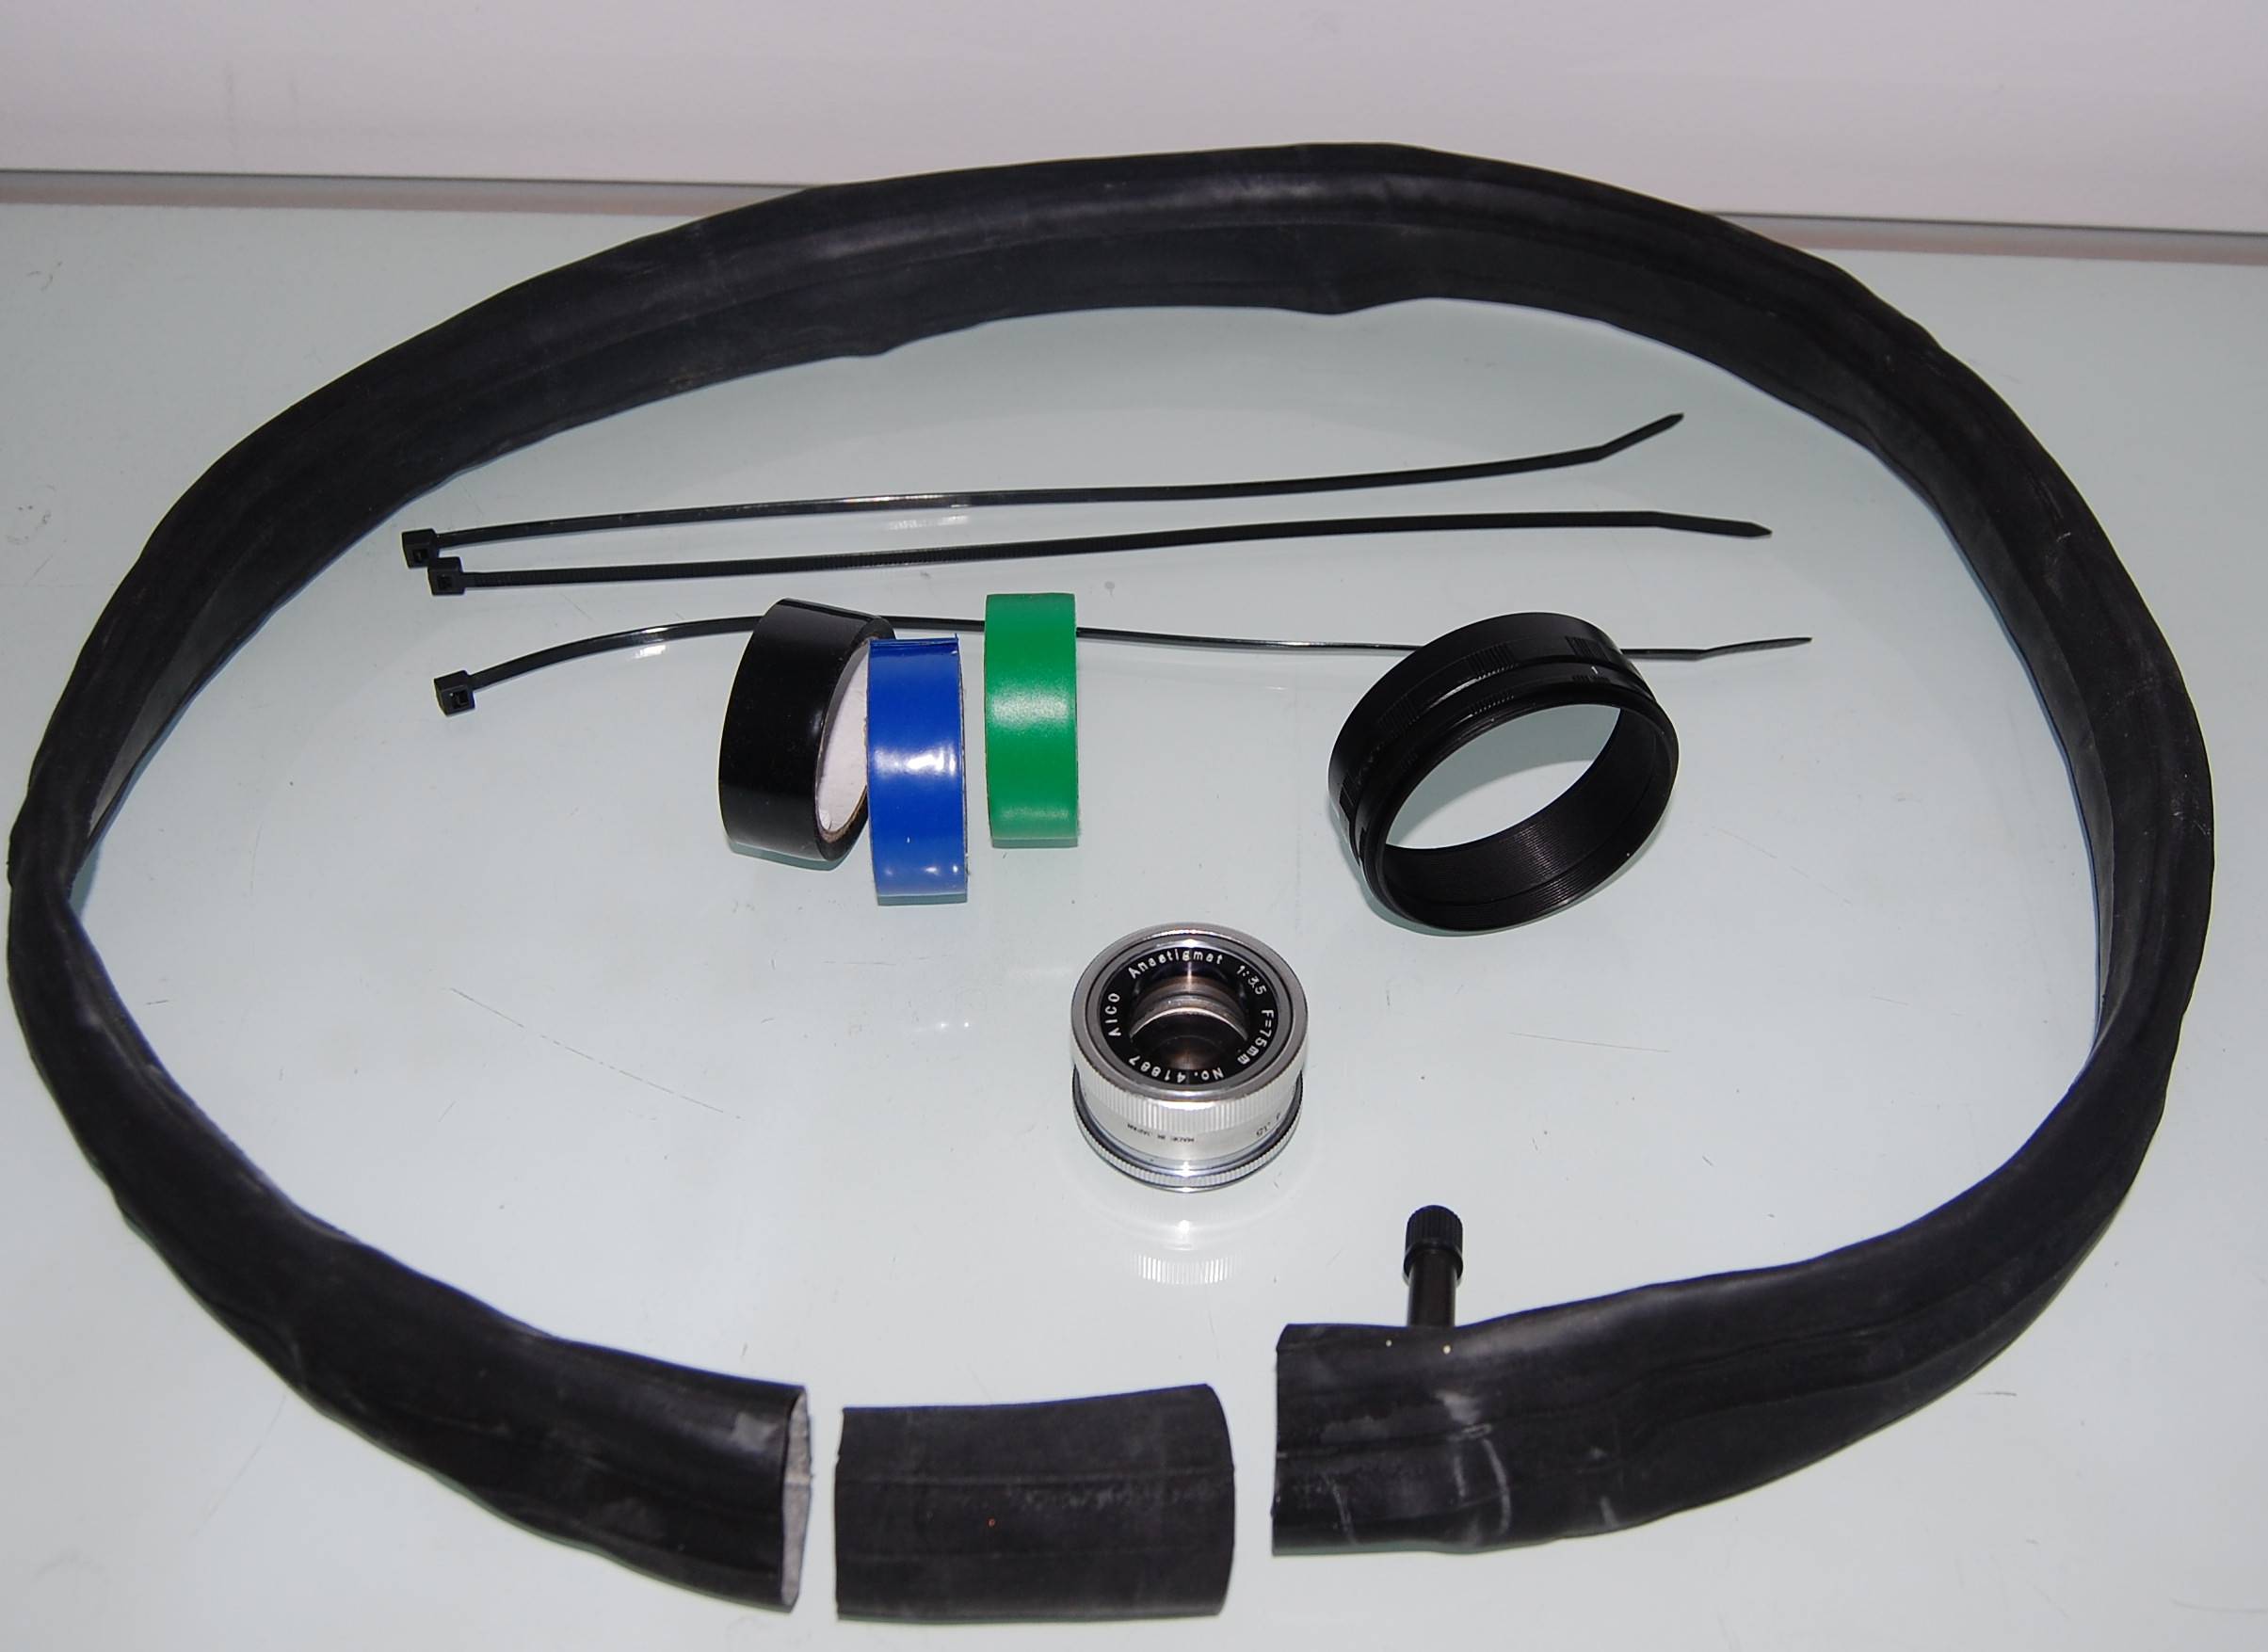
First things first – what do you need to build your own lens?
1) A camera body with TTL (through the lens) viewing. You’re going to need to able to see exactly what the lens sees, so you can see what’s in focus and what isn’t. An old slr is ideal…and it needs to be able to focus manually, because you’re not building an autofocus lens!!! I’m using my Minolta Dynax 5, but any manual focus SLR will do just as well.
2) Some sort of lens. For this to work properly the lens should be for a larger format than the camera you’re going to use. This is because a 35mm lens projects an image exactly the same size as a 35mm negative. As you tilt and wiggle the lens about some of the image will fall outside the negative and some of the negative with be blank. A larger format lens projects a larger image, so you can move it about and still cover your whole negative.
So for our 35mm slr, a medium format lens would be perfect or you can do what I did and buy a cheap enlarger lens from ebay. (I haven’t tried using Diana or Holga lenses but you could give that a go.) A long focal length is better too, especially if you want to try the miniature world stuff, I’ve heard that it has to be longer than 50mm. Mine is 75mm.

3) Some way of fixing the lens to the camera body – for a good secure fit some kind of lens adapter/extension tube is really helpful as it locks into your lens mount and tells the camera that there’s a lens attached. I used a set of extension tubes designed for macro photography. They’re cheap to buy, they come in all lens mount fittings and consist of four or five rings that screw together, you’ll probably only need the bit that attaches to the camera body and maybe one extra ring to give your lens a bit of stability.
4) Something flexible to allow you to tilt. I’ve seem pictures of lenses using rubber plungers or thick plastic sheeting. My first attempt was made from a vinyl pouch that had contained headphones, the current model uses a piece of bicycle inner tube. It just has to be black, light tight and bendy.
5) Fixing agents – for me, electrical tape and plastic ties.
How you do it.
First of all, you have to make sure that your lens is capable of focusing, which means making sure that you have it the right distance away from the film in your camera. So, set your slr to manual focus, take the lens off and hold the lens you’re going to use in front of the camera, moving it back and forwards slightly until you get a focused image. This is where the lens needs to be relative to the camera, so this distance is going to be the finished length of your lens. Obviously, unlike a normal lens, you will be able to move your lens back and forwards, so it doesn’t need to be inch perfect, just more or less in the right position. Then cut your bicycle inner tube/ black vinyl etc to a slightly longer length (you need to overlap on the lens and on the adapter, but remember that you have to include the length of the adapter in the overall lens length.)
Then you have to connect the lens and the adaptor. So take your slice of inner tube stretch it over the adaptor. I found that as it was harder to stretch the rubber over the adaptor, it was best to do that first. Once it’s on (and yes, you’ll have done quite a lot of swearing and this point and it would have helped if you had eight hands to do it) fix it with electrical tape, and heave a sigh of relief.

The lens is smaller and so this bit is easier – before you start, open the aperture dial as wide as possible, then pull the inner tube round the lens. Try and leave the aperture dial free of rubber so you can adjust the aperture if you need to, most of the time you’ll be shoot with it as open as possible though.
Again, fix it with electrical tape. Then put it on your camera and check that you can get a clear, focused image. If you can’t, the lens fitting is too short or too long and you have to cut another piece of inner tube and try again. Once it’s right, secure it with cable ties over the electrical tape on both ends (lens and adapter). I find that I use the little plastic nubs of the cable ties to manipulate the lens, so if you can fit four at north, east, south and west of the lens end you’ll get good control of the tilting effect.

All you have to do now is put the whole assembly on your camera….

…and get out there and start tilting. You’re lomographers, so I don’t have to tell you what to do. Do whatever you want!


written by kvboyle on 2011-03-03 #gear #tutorials #diy #camera #tipster #camera-modification #homemade-lens #top-tipster-techniques


20 Comments