The Tardis - Making the Dual Filmed Film Box Pinhole Camera!
15 43 Share TweetWith my last tutorial, I showed you how to turn an ordinary film box into a super wide angle camera. This time I decided to stack two 35mm film rolls into one camera, exposing them simultaneously resulting in an image split over two negatives! You like the sound of that? Of course you do!

Before I begin I must note that I will be referring to my previous tipster as this tutorial shares much of the same techniques, and I felt I would be simply repeating myself. I’d advise you to read that first and for those that have, this tutorial will be a breeze.
What you’ll need;
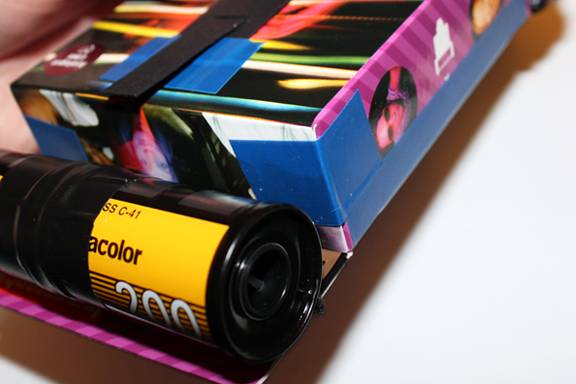
- Any 120mm Lomography film box (I used a 120mm 400ISO box)
- Two fresh rolls of 35mm film
- Two empty 35mm film canisters with the small piece of film still attached. You can get these at any photo lab, just ask :)
- Aluminium foil (I cut mine from a foil turkey tray)
- Needle
- Pen/pencil
- Black marker
- Ruler
- Scissors
- Craft knife
- Black tape
- Black card
- Wooden lolly sticks
Begin by taking the empty box, open the bottom and cut along the folded edge as shown


Now cut off the little flap

Flatten out the box, mark the panel shown with a X to find centre and draw a small square, roughly 5mm x 5mm in size. Cut out this square with a craft knife


Making the pinhole
Cut out a small square from your aluminium foil, 2cm by 2cm will be enough, and carefully pierce the centre. Just push the tip through, but not the entire needle. The idea here is to get the smallest hole possible. ’The smaller the pinhole the sharper the picture quality’ apparently…


Taking the foil, align this pinhole to the centre of the square of your film box. Tape in place with some black tape


Using a black marker, colour the inside of the box. This reduces internal reflections which will improve the quality of your images
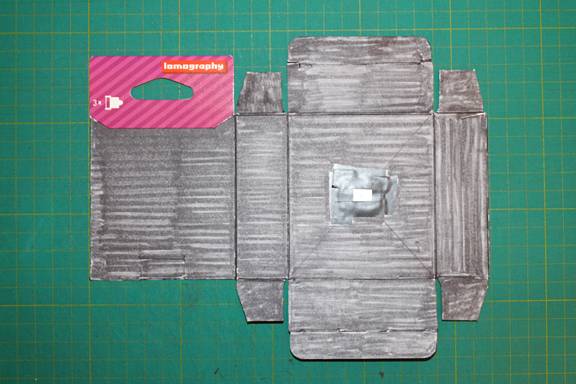
Apply some tape to the right edge and begin to reconstruct the original box shape. Tape the outside of this edge with more tape. I used blue tape here as I was running low on black…


Locate the flaps shown and cut these off along the folded edges. You should then cut an extra 1mm off each flap. The reason for this will become apparent later


Making the shutter
The shutter mechanism used is exactly the same one used in my previous pinhole camera Please read the section under Making the shutter. The one I made measures 2cm by 7cm, with the shutter strip at 1cm by 10cm

Tape this newly made shutter to the camera box, aligning the hole of the shutter with the pinhole of the camera body


Test the shutter by pulling it to the right to open, then back again to close. I placed markings on mine to aid me while shooting
Loading the film
Take a fresh roll of film and cut off the header


Tape the tip of your fresh roll (Fuji) to the film tip of the empty canister (Kodak). Check that the film winds smoothly by turning the spool of the empty canister (Kodak)

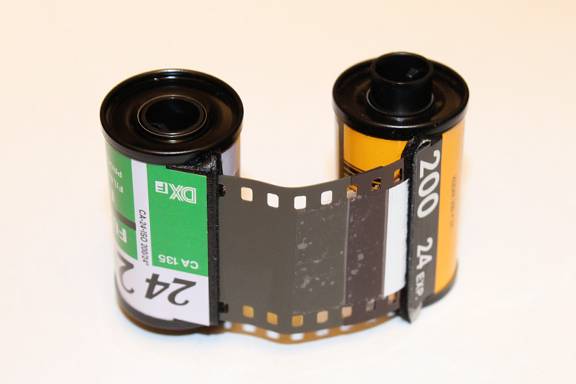
Repeat the above steps with another fresh roll and empty canister so that you have two sets
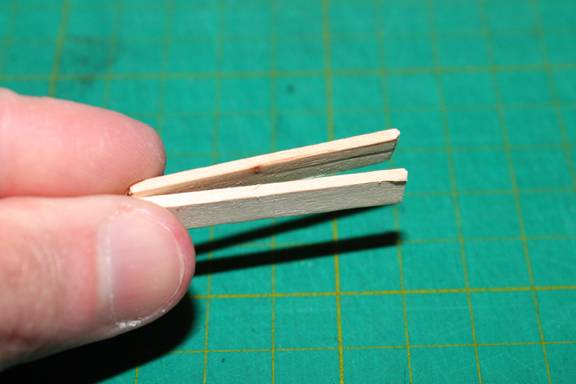
Take one lolly pop stick and cut it to roughly 3/4 cm in length

Snap or cut this to narrow it down. The one shown is about 5mm wide

Take one of the loaded canisters and place the piece of wood in one of the two slots shown


Now attach this to the bottom of the other loaded canister, aligning the wood to the slots of both canisters

Cut and adjust the piece of wood until both canisters sit flush with one another

Once you have got this right, pull it apart again and cut several more pieces of wood to the same size. The extras will prove useful later on

Take two of these pieces of wood and place them in the slots of the canisters. Attach as before


Rotate the canisters so that the film exits are aligned. Tape them in place at the join but be careful not to get tape on the actual negatives themselves


With the box facing you, thread the film rolls through the box. Fresh rolls on the right, empty ones on the left
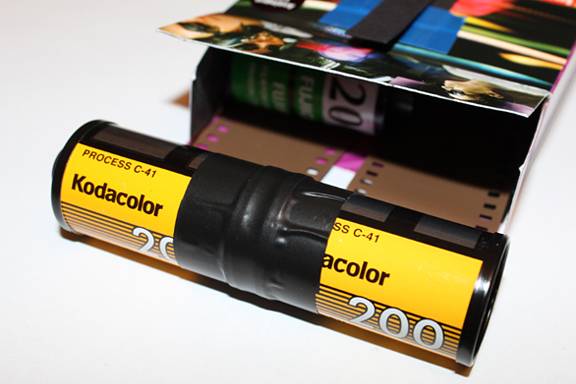
Check that the negatives can move freely under the gap, cut the flap if necessary. Now tape down the outside edges to reconstruct and re-enforce the box

Push the film rolls flush against the box opening, making sure the negatives run directly in and out of the box. Tape this in place as shown


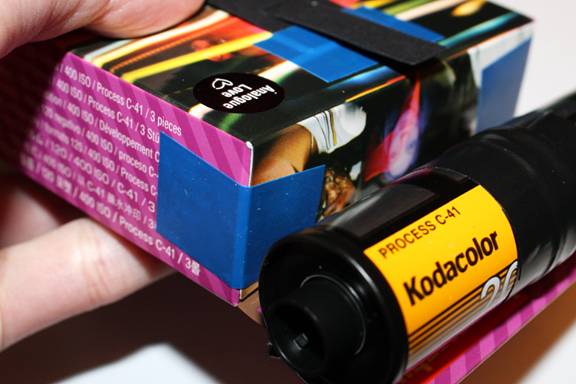
Once those are secure, repeat this process on the reverse side. Pull the films out through the box, align both canisters and tape along the middle as before


Close the box, again making sure the gap is large enough for the the negatives to run freely. Cut the flaps again if necessary, then tape up the sides


Tape these flush against the box with the negatives running directly into the box


You can now begin light proofing the camera by covering the entire box with more tape. Remember to pay extra attention around the film spools. The aim is to tape up the areas where the film is entering the box (to avoid light leaks) but at the same time allowing the spools to spin freely


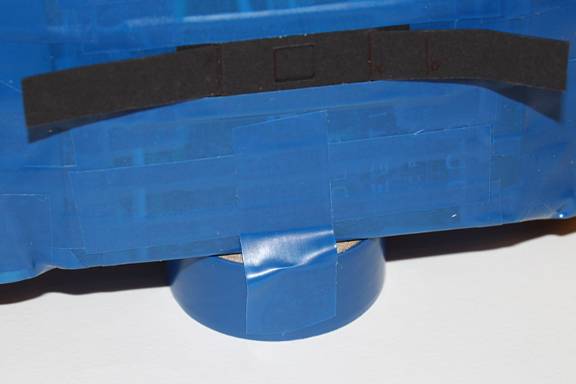
Spool areas covered

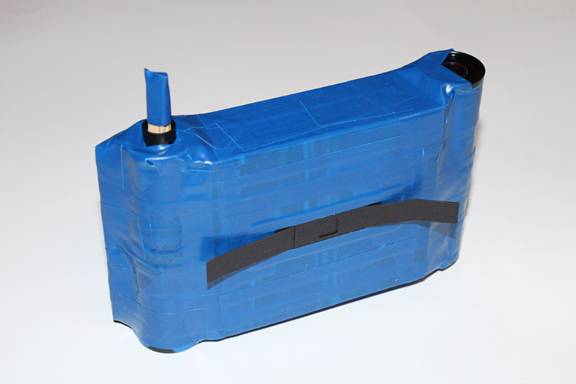
Box covered!

You’re nearly there! Take two pieces of the lolly sticks you cut earlier and partially tape them together as shown

Place this on the take up spool and you have a winder!


Camera finished!

Additional notes
As you’ll be rotating two rolls of film, this might be a little difficult with just one winder. I’ll advised you to make another winder and attach it to the bottom spool to make things easier. To advance by one frame, rotate by two full turns

When you come to shoot with the camera you’ll notice that the camera tilts slightly to the right. This is due to the film canisters pointing down on the left side. The camera will easily remain upright while shooting but if you want to remedy the slight tilt you can tape the camera to a book or a pack of cards. I taped mine to the closest thing I could find…

Why look further right?


With my last pinhole tutorial many people messaged me to ask how I kept the camera so steady? If the camera had a tripod mount and if I could maybe add one in future versions? The secret is I simply rested the camera on any flat surface I could find. I felt that this method made me shoot much more creatively by forcing me to think about my environment and be more resourceful as a result
With that said, I wanted to shoot some self portraits so I did what common sense told me to do… I taped the camera to the wall

The fact that the camera is covered in tape anyway allows me to utilize it’s surface and attach it to pretty much anything. Add to this the makeshift tripod meant that I always had tape to do so!
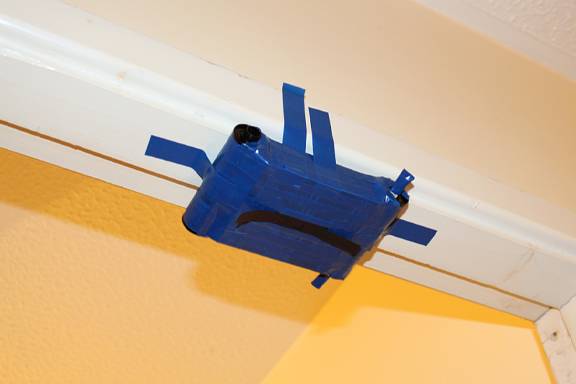
I mean really go wild and vary your angles too! I taped it to a door frame for a bird’s eye view…
As you reach the end of this tutorial you may have noticed something missing. Example shots. The truth is, I don’t have any. There was a mix up at the lab and my film rolls have now been “lost”(?!) I’m sad as you are… so please, blame the lab technicians :(
With that said, I hope you enjoyed reading my tipster and the first chance I get, I will definitely redo the shoot and post up the results! Thank you so much for reading and for your continued support. See you next time folks!
written by lostlittlekid on 2013-03-04 #gear #tutorials #pinhole #camera #sprockets #tipster #film-box #home-made #pinhole-masters-and-magic #pinhole-tipster #two-films


15 Comments