DIY Lith Printing

19

From time to time we are presented here at LSI with different ways of manipulating film; by peeing on it, scratching it, boiling it while putting our health at stake… but I don’t think I have seen a single lab rat tips on things you can du to your prints. Most of us apparently have our own darkroom, since we can develop our own color/slide film after having peed on it, so why not show some printing tricks.

From time to time we are presented here at LSI with different ways of manipulating film; by peeing on it, scratching it, boiling it while putting our health at stake… but I don’t think I have seen a single lab rat tips on things you can du to your prints. Most of us apparently have our own darkroom, since we can develop our own color/slide film after having peed on it, so why not show some printing tricks.

OK, I’ll start: My favourite for the time being is lith print. You need to have a lot of time on your hands, plus some color or B/W negs. And some suitable paper.

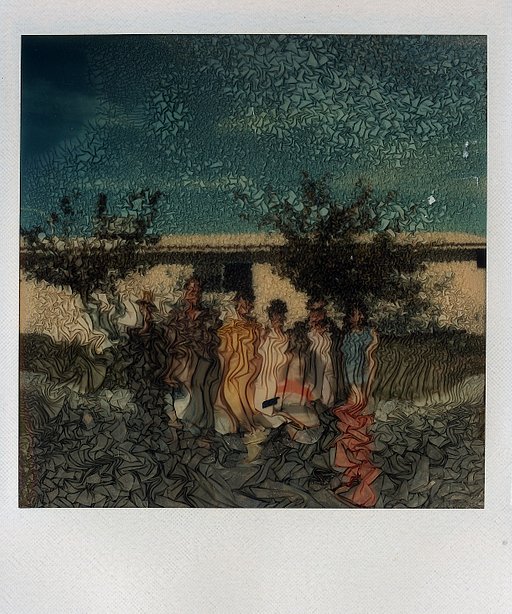
Lith printing requires the use of highly diluted lith paper developer, a substance that comes in two separate bottles to be mixed just before use. It may be labeled “mix 1+1+10” but you will make that maybe 1+1+30 or so… overexpose your paper like crazy; that’s maybe 3 or 4 steps overexposure (maybe 2.5 or 3 minutes’ exp on a 10×12″ print). The paper goes in the developer and you wait for 5 to 20 minutes.

You will have plenty of time to listen to a good audio book. But don’t leave the darkroom! All the time you will have to check your print so that it stays under the surface of the developer.

Development time is determined by eye. At first the image will appear as a faint, soft toned image, but once the darks are showing, it all happens a lot faster. As soon as it looks “ready”, snatch the print from the developer and quickly move it to the stop bath. Fix it as usual and your print is forever there!

Yes, well, and it’s not super easy to get it right the first time. But as you get the hang of it, you’ll want to quit your day job to spend every day going through all your negs and lith print them to find something new in them.

Check out LD-20, Moersch Easy Lith, Rollei Vintage creative. Some papers are better than others. I just tried Efke Varycon PE this week and it worked fine. Also try Foma, Forte, Kentmere Kentona, Sterling… then show me the result! Please do, I’d love to see!

written by lovely_lena on 2008-12-29 #gear #tutorials #lab-rats #b-w #tipster #darkroom #lith-printing #diana

19 Comments

  1. breakphreak
    breakphreak ·

    Wise shots, weird processing, crazy lo-fi :)

  2. stouf
    stouf ·

    The result is magical !

  3. eagleye_slives
    eagleye_slives ·

    OOOOH WOOOW!!!
    speachless...
    i love that tissue and contrasts!!!

    great thanx for showing that it is possible to do that hand made and not only photoshop wise!

    longlive analogy!!!

    love to you too!!

  4. superlighter
    superlighter ·

    what a wonderful gallery! how I wish to have a dark room!

    Analogue Never Die!

  5. drgonzo900
    drgonzo900 ·

    Sooooo cool!! Such beautiful images!!! I really want to try this now.

  6. jelga
    jelga ·

    i've been meaning to learn how to develop and print for a while now...and these amazing photos were the last little push i needed! beautiful work!

  7. makeyuu
    makeyuu ·

    grymt lena! jag visste väl att det var du så fort jag såg "DIY Lith Printing"-rubriken. måste pröva detta!

  8. lomodirk
    lomodirk ·

    YES!!! One of the best tips I`ve ever read here. Fine work, great results, love it!

  9. anarchy
    anarchy ·

    Wonderful gallery Lena!!

    And as an added bonus to this technique one gets to spend even more time than before inside a pitch black room full of toxic fumes, just the way we like it ;-)

    /Andreas

  10. vicuna
    vicuna ·

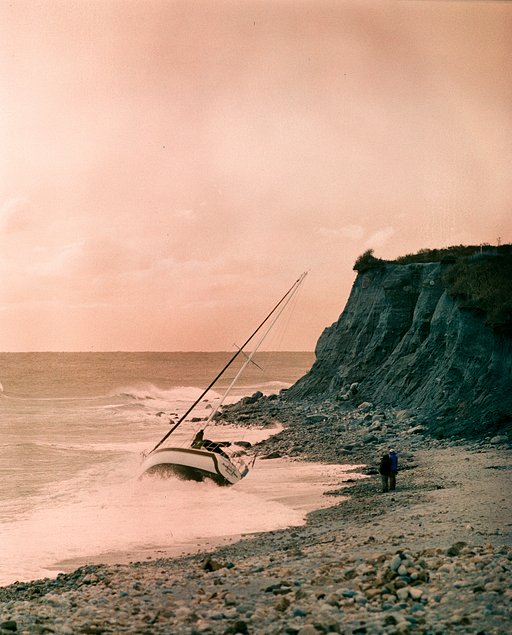
    Extraordinary creative tip! The shots are almost surreal, as from a dream, such a texture and soft dreamy universe.....! Congrats Lena! :)))

  11. maddyoulook
    maddyoulook ·

    they look like sketches.. gorgeous :D

  12. opposablethumb
    opposablethumb ·

    Wow! Number 11 is one of the spookiest images ever.

  13. weechonghooi
    weechonghooi ·

    what a lab work... great lab work.. i love shot number 3 so much..

  14. lovely_lena
    lovely_lena ·

    Hey!
    Thanks everyone!
    I dreamt tonight that someone had turned my darkroom into some kind of cosy storage space/wardrobe. With red little X-mas curtains and candles were lit on the shelves where I keep my photo paper. What a nightmare!!!

    Thanks again for your kind comments. If you got some for a X-mas gift, now you know how to spend it.
    :-)
    /Lena
    PS. opposablethumb, number 11 is a pinhole self portrait, with a 6 minute exposure. My neck and shoulders were kind of stiff after that session. DS.

  15. anelfandhiszippo
    anelfandhiszippo ·

    Gillar skarpt dina lith bilder, brukar kika in på fotosidan då och då å kolla om det kommit något nytt, ska bli att prova på när jag får tillgång till mörkrum!

    //Mattias

  16. makeyuu
    makeyuu ·

    i think the knife would love #11

  17. kylewis
    kylewis ·

    As usual Lena, your liths are to die for! Wonderful!

  18. donrafaeli
    donrafaeli ·

    cool thing. wish i had developing equipment :(

  19. leena
    leena ·

    This is great, love lith printing but i never even reflected on making lith prints with lomo :) Thanks for reminding me.

More Interesting Articles