Show Off Your Slides with this DIY Slidelight
2 21 Share TweetThis is a guide on how to build your own slidelight so you can show your slides all day in style!

For many months I had been craving the Slidelight from SuckUK. I wanted to have it for so long, but the price was just ridiculous for me. So this summer I came up with the idea of building my own slidelight.
The first ideas came quickly, but the actual work was difficult. I tried to cut a thin line on two planks of wood so that the slides could be held in there. It took me a day to realize that it was not working at all. I went to the hardware store to get some fresh ideas, and there I thought I found the perfect solution. I found a kind of rail where a slide could fit in perfectly. There was also an LED band being advertised in the store, so I bought that one as well. Now, after building three slidelights (each one from a different idea, or using different supplies), I think I nailed it!
Here’s what you’ll need:
- two rails for the slides
- two wooden strips plus some more
- some screw clamps
- wood paste
- a saw
- measuring tape
- paint
- LED band
- two white baking sheets
- double-sided duct tape

Let’s go through this step by step:
1. Arrange the core lamp
First you need to build the core lamp, which means you have to do some woodwork! You need to attach the two rails with the two wooden sticks so you’ll have your top and bottom parts of the lamp. This would be easier if you’ll have someone to help you apply the wood paste and the screw clamps.
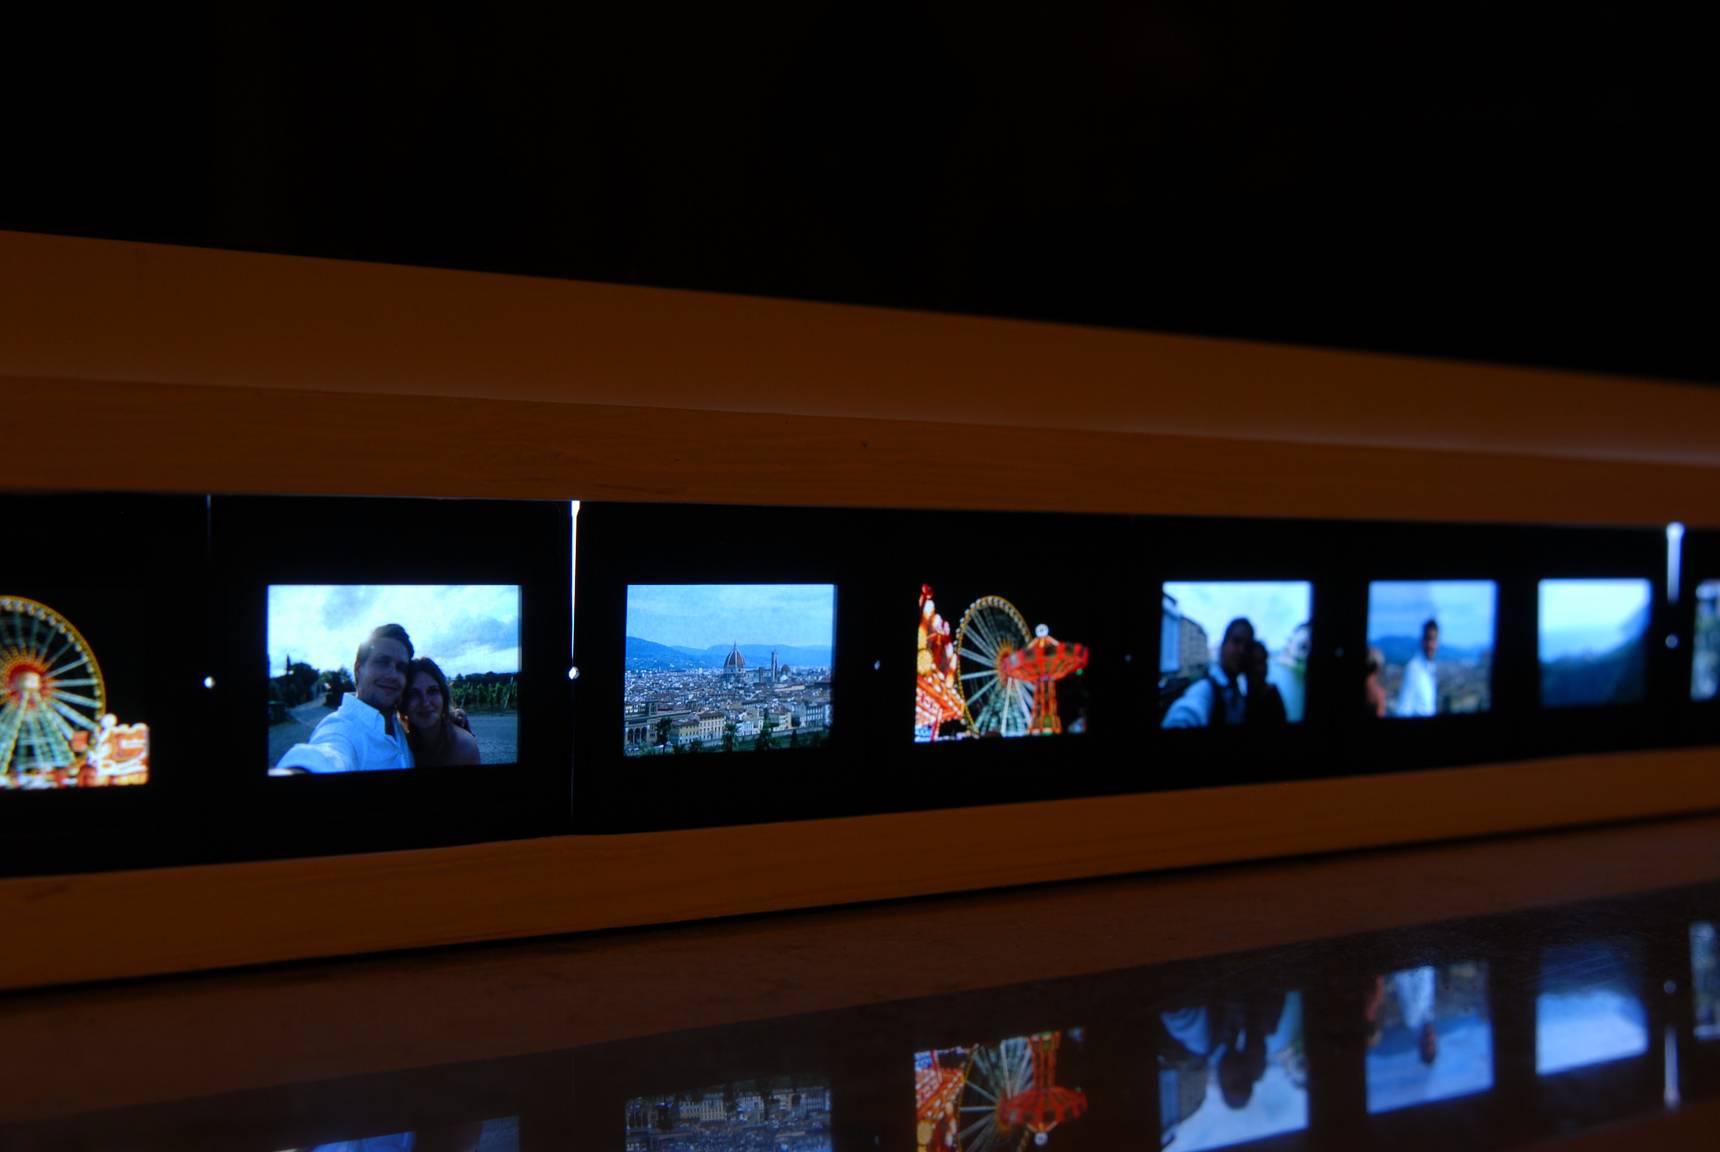
Next, measure the height of the lamp. Do this by putting a slide onto the bottom rail and measure how much space you’ll need so you can easily slide your slide through the lamp. A normal slide measures 5×5 cm, so depending on your strips and rails, you’ll need around 5 cm.
After measuring the height, you need to saw off two placeholders. You can even cut a small hole through one of the placeholders so you can pull your LED band cord through there later.
Now, you only need to glue the bottom and top parts together with the placeholder.
The core lamp is already finished!


2. Color the lamp
When the wood paste is dry, you can start painting your lamp. I used some leftover white indoor paint, but you can use whatever you like.


3. Set up the lightning
My first slidelight had some bright slides in there, and when you look at some you could actually see the LED lights through them. So I came up with the idea of using white baking sheets. I cut them approximately 10 cm in height so it’s doubled. Then I put some double-sided duct tape inside the lamp and attached the baking sheets in there.
Now the last step is attaching the LED band. The ones I bought came with tape under them, but you could simply glue them on the wood. I had it go around once inside the lamp, then cut it.


Your lamp is now finished and ready to brighten up your home!
But the difficult part starts now: Which slides should you put in it?


written by speedintheabsenceoflight on 2014-10-20 #gear #tutorials #crafts #diy #light #slide-film #lamp #tipster #led #woodwork #handicraft #slidelight


2 Comments