How to Customize Your La Sardina and Make It One of a Kind
6 47 Share TweetIf you always wanted to have a unique dope looking camera no one else has, this is for you! The La Sardina camera is predestined and you can give it a unique style.

At first sight it may not seem to be that easy to change the style of your La Sardina but it is actually very simple. So read on and maybe next week you’ll have a one of a kind La Sardina yourself.
But just a little note from my side upfront: I had the La Sardina Sea Pride but it broke and there was no Sea Pride anymore at the LomoStore so I got a Marathon instead and thought, “Well, even though the style isn’t that good it’s the result the picture that counts!”. For sure it does, but anyway I´d rather like to have a good looking camera and so I gave it try to customize it.
So now here we go and this is what you need for it:
- A cutter.
- A small clockmaker screwdriver.
- A copy shop with something similar to bonding sheet. Otherwise, you would have to fix your design with glue. But besides that, bonding sheet is more waterproof in case your cam is ever hit by raindrops.
- An idea of what your camera should look like.
So if you already know what kind of picture/motive/print or whatever you want to be visible on your camera to give it a unique style, you should scan it or go to the copy shot and adjust it to the visible area of the La Sardina camera. In my case I chose a graphic of one of my favourite artists: Jeremy Fish. As it still should somehow refer to a “La Sardina” and the Lomo-Idea of it i chose a fish-design for the front. Exactly a fish with a gun which refers to “shooting” as you may already have noticed.

For the back a simple graphic of an artist which I found in a mag and I really like. A simple “lo-fi”-design.

So I had to copy and change it in a way it fits on the visible area of the Sardina which is precisely 10.4cm x 5.2cm. If you want to make it one or two millimeters more in length and width it doesn´t matter. Quite the contrary, because later on there is a frame on it so it gives a more pro look as nothing is cut off which anyone could see. In my case the design of the back is a copy and so unfortunately the lenght doesn´t fit but I´ll scan it next week and make it better so the film-window remains clear.
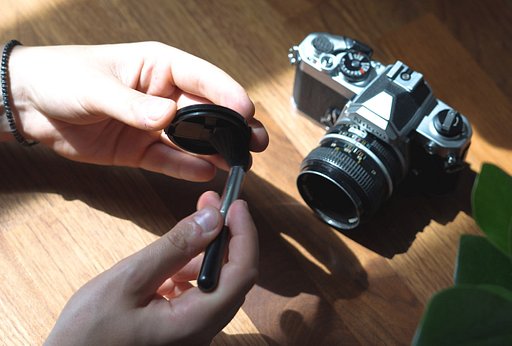
As soon as you have your copy you can begin to customize your camera. The La Sardina cameras do have in the back one and in the front two little plastic plates on which the original motive of the camera is printed/fixed on. Those plates can easily be removed because they´re fixed with a frame.

So the first step is to take the screwdriver and remove the 8 screws (each frame with 4 screws). Then, you take off the frames. After this, you can easily remove the plastic plates of the front by taking the screwdriver and lifting the plastic ring around the lens a little bit which in case of the front plates has two little bolts and the plates have two little holes. You don´t have to remove the two screws of the plastic ring to remove the front plates! Your camera should now look like this.

Now you get what you got from the copy shop and fixed it on the plates.

Place the plates again on the camera. But you should again use the screwdriver to make to tiny holes on your bonding sheet so the bolts can easily fix the plates.


And after this step fix, them with the frames you have removed in the beginning. Now everything is already done with the front design. What is left is fixing your design on the plate of the back and then fixing it with the frame which is very simple. What next? Enjoy your own style of the camera and probably someday there will be someone asking “Where´d you get this one?” and make you proud.


Have fun customizing and if something is unclear don´t hesitate to ask me. Thanks for reading!
written by bloomchen on 2012-05-17 #gear #tutorials #diy #camera #tipster #jeremy-fish #lomography #marathon #kamera #customize #camera-modification #sardina #la-sardina #one-of-a-kind #unique-style


6 Comments