Homemade Splitzer for Diana
19 62 Share TweetAre you a fan of the Splitzer effect?, but prefer to keep saving up for your next camera?
A while ago, when I started to delve into the depths of lomography, I discovered a marvellous little gadget, the Splitzer (for the Diana, in my case). I couldn’t stop drooling over other lomographers’ photos with that magical mix of different points of views in a single image and all the other surprises that this ingenious little instrument gives you.
But, as we all know, developing costs money, so do films and of course the cameras. I prefer to spend those 12 euros (that the Splitzer costs) on an of the above.
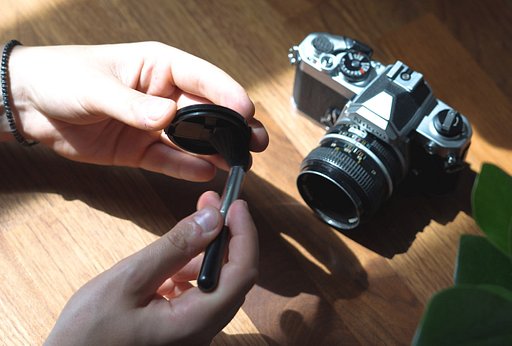
That’s why I decided to make my own Splitzer. The truth is it couldn’t be more simple and economical.
The only thing you need is a little plastic tape and to be able to calculate more or less what you want to cover up. Of course being a lomographer, the fun comes with not knowing exactly how it’s gong to turn out!


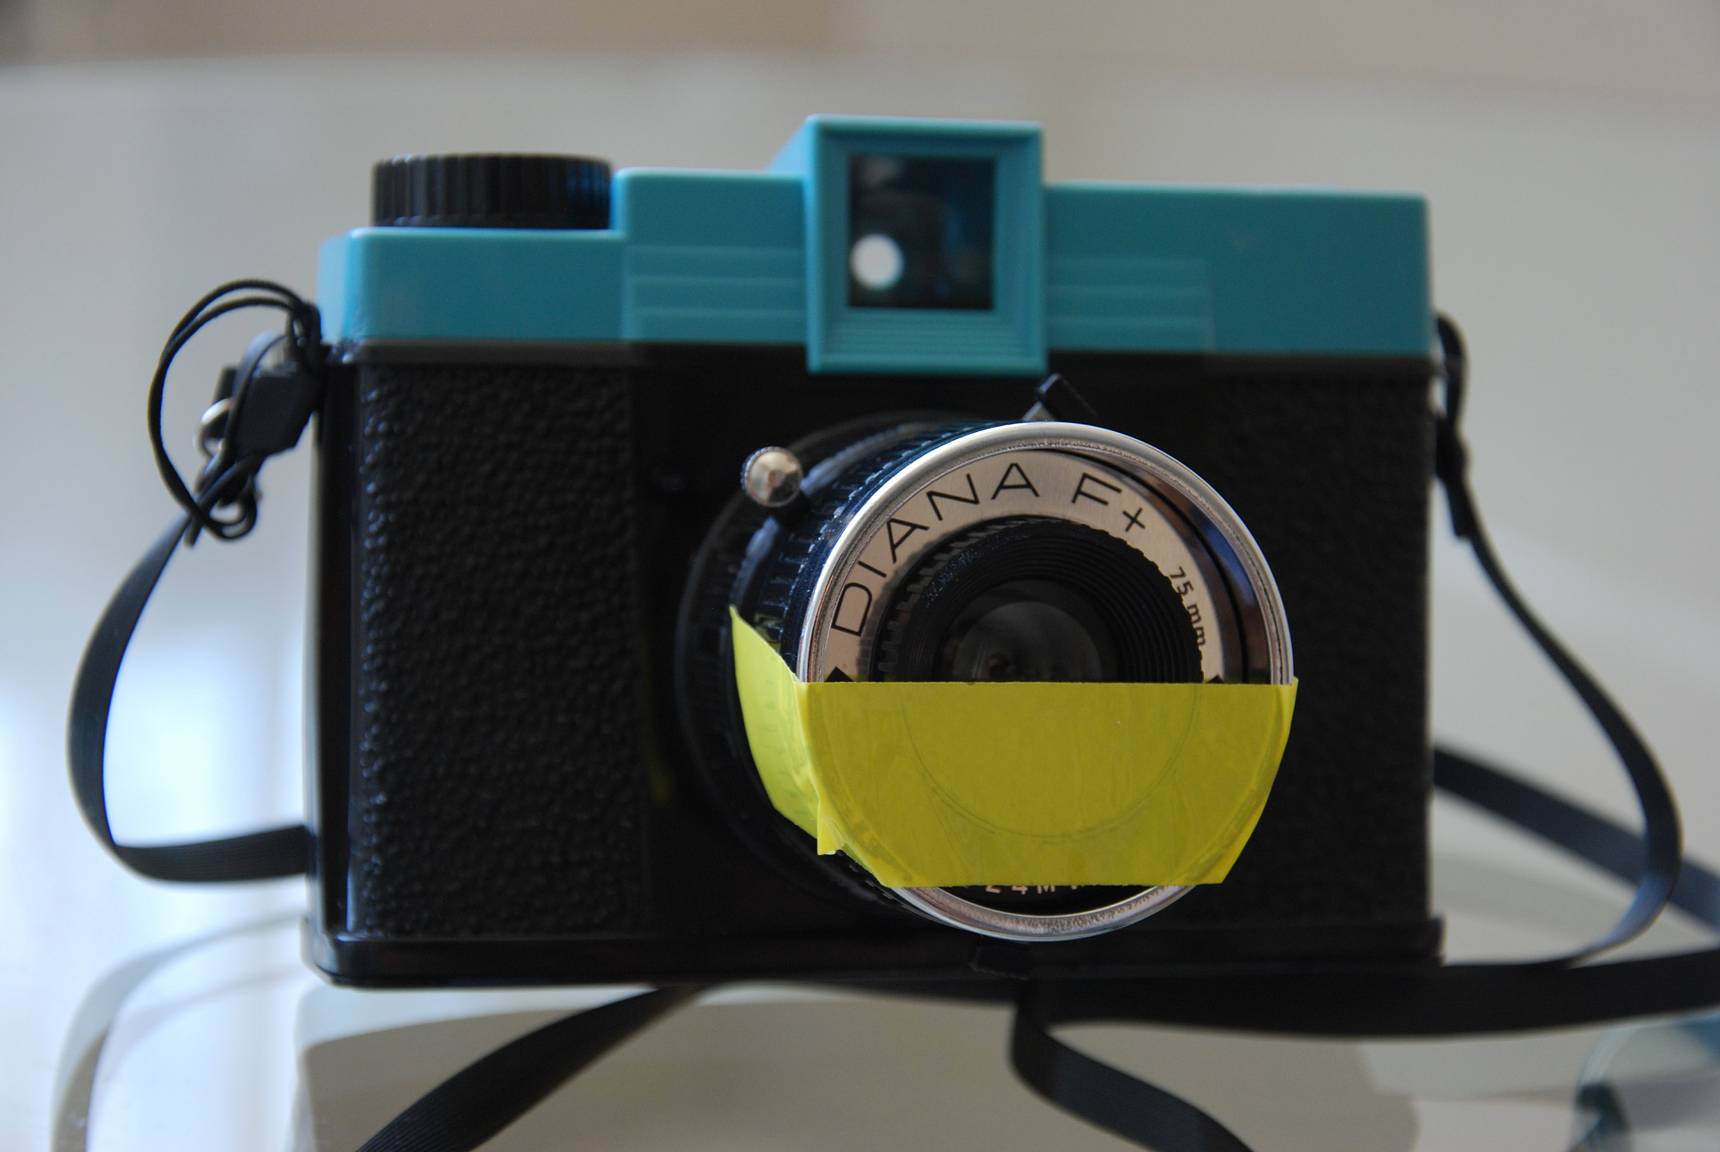

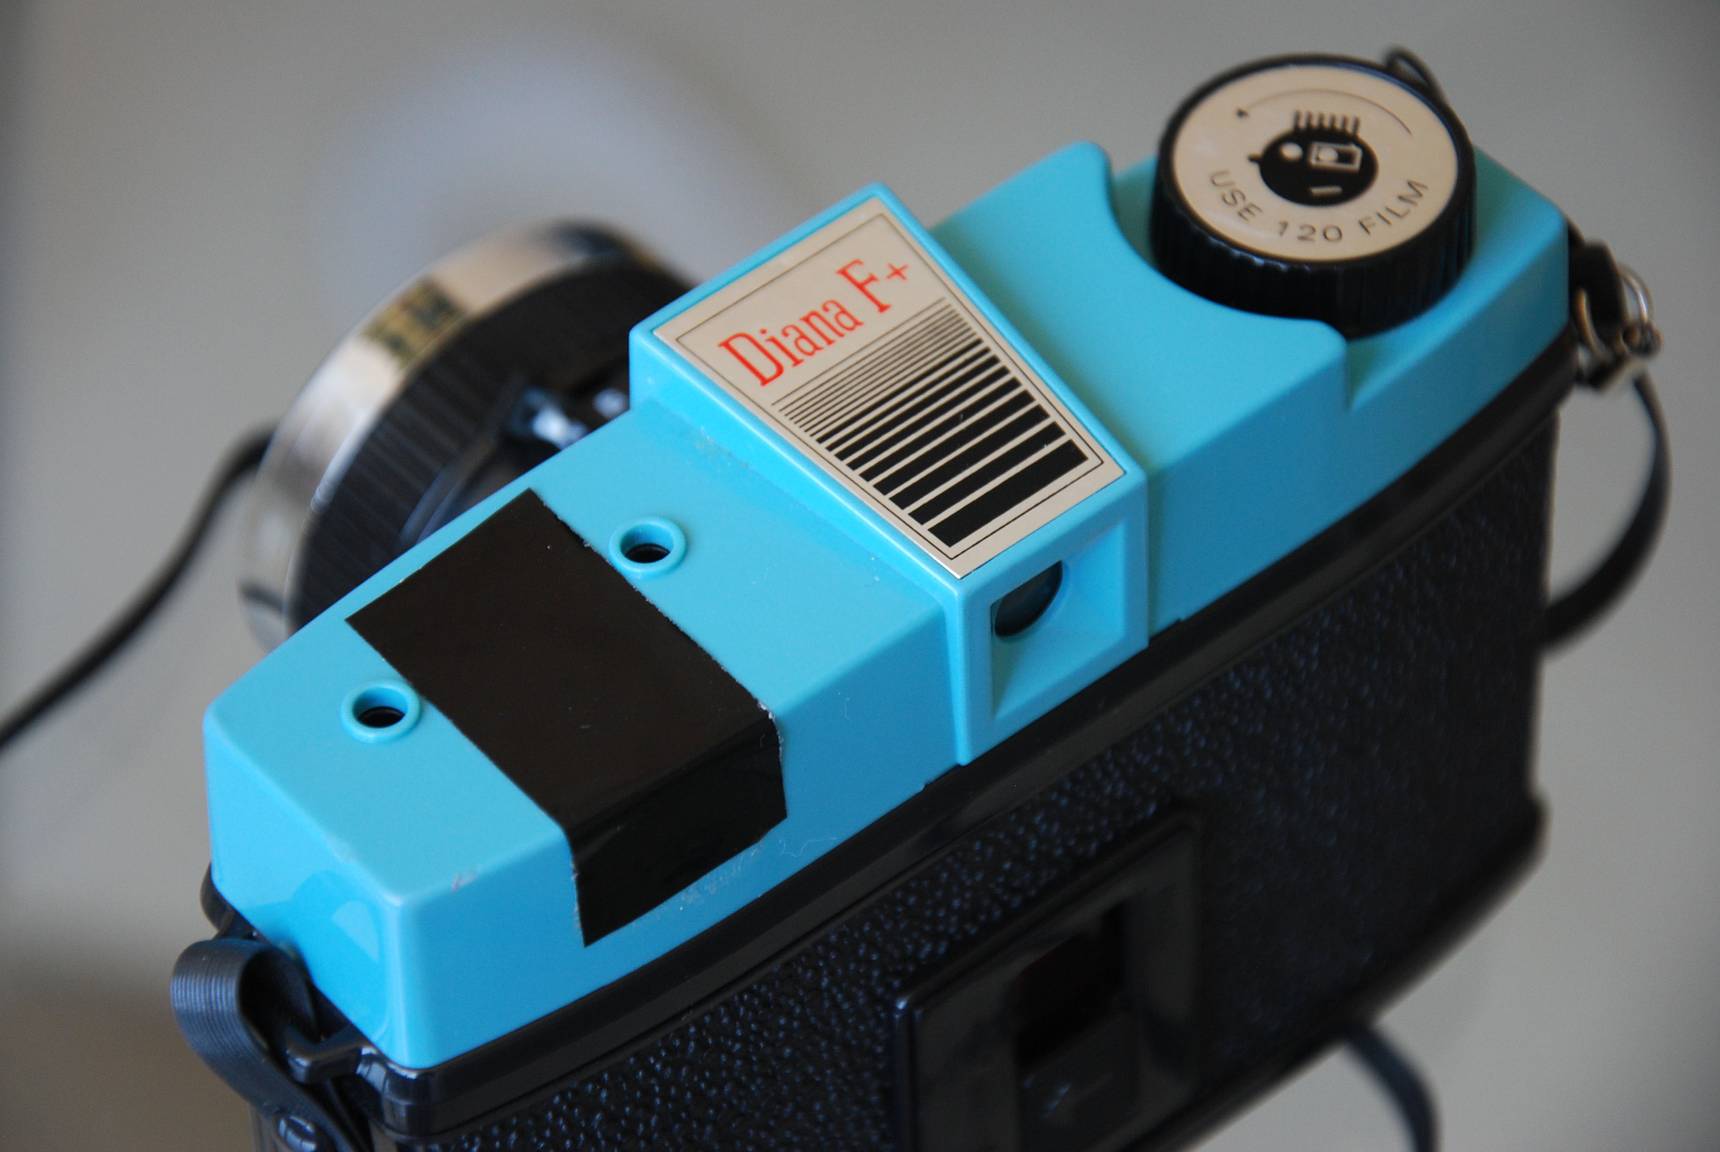
Note: At first, I thought it would be best to use black tape, being the darkest. But I’ve also used ordinary sticking plasters and they worked fine, so just try with whatever comes to hand. There are no rules!

I recommend that you always have a little bit of tape stuck to your camera for whenever the need arises. It’ll also give your camera a little personalised touch!

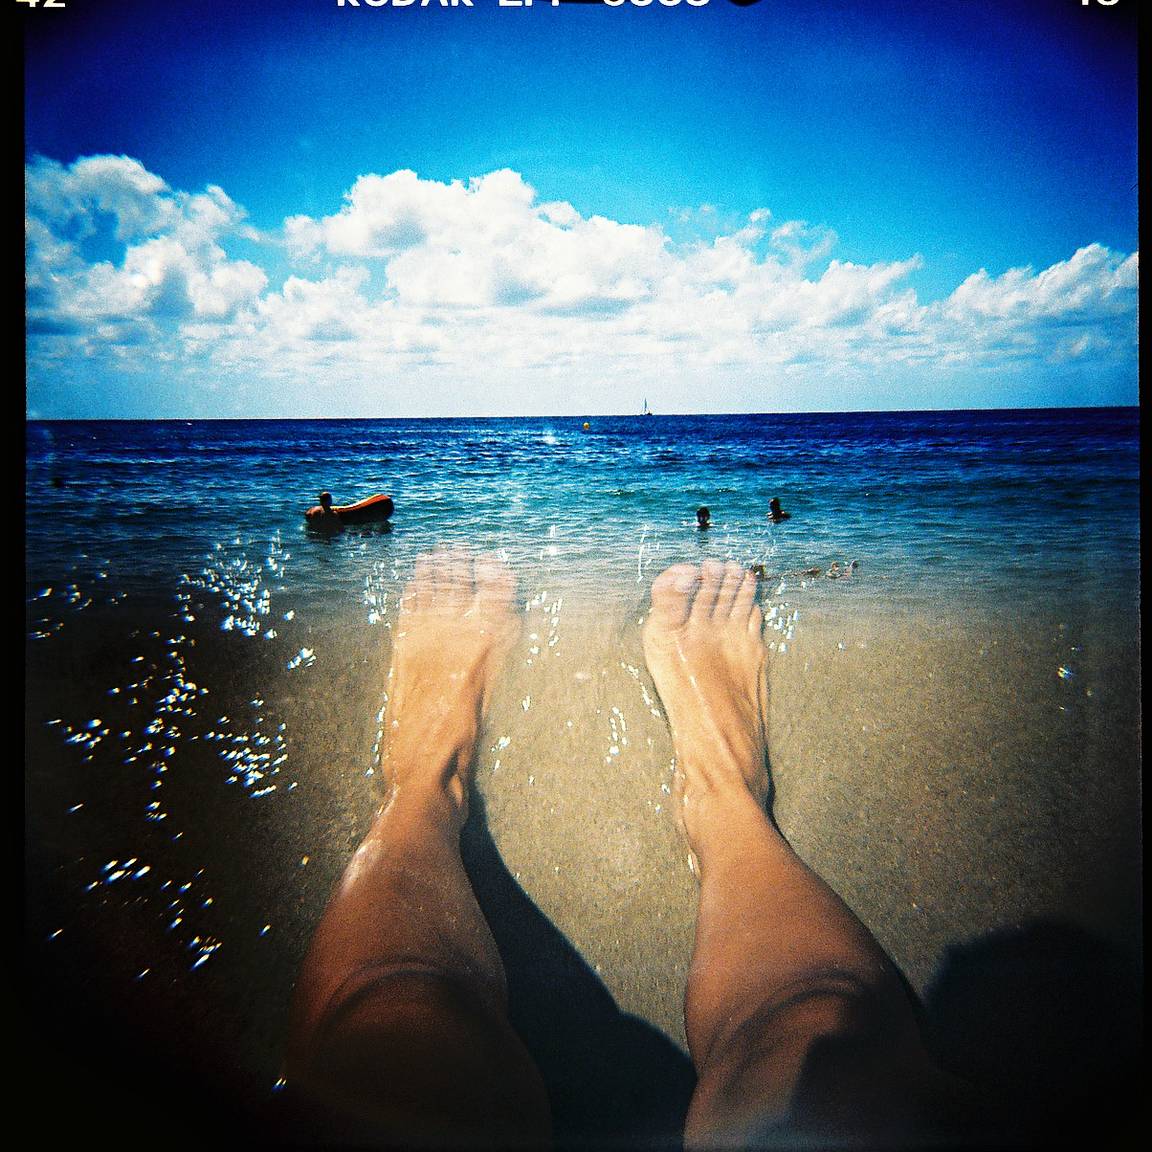
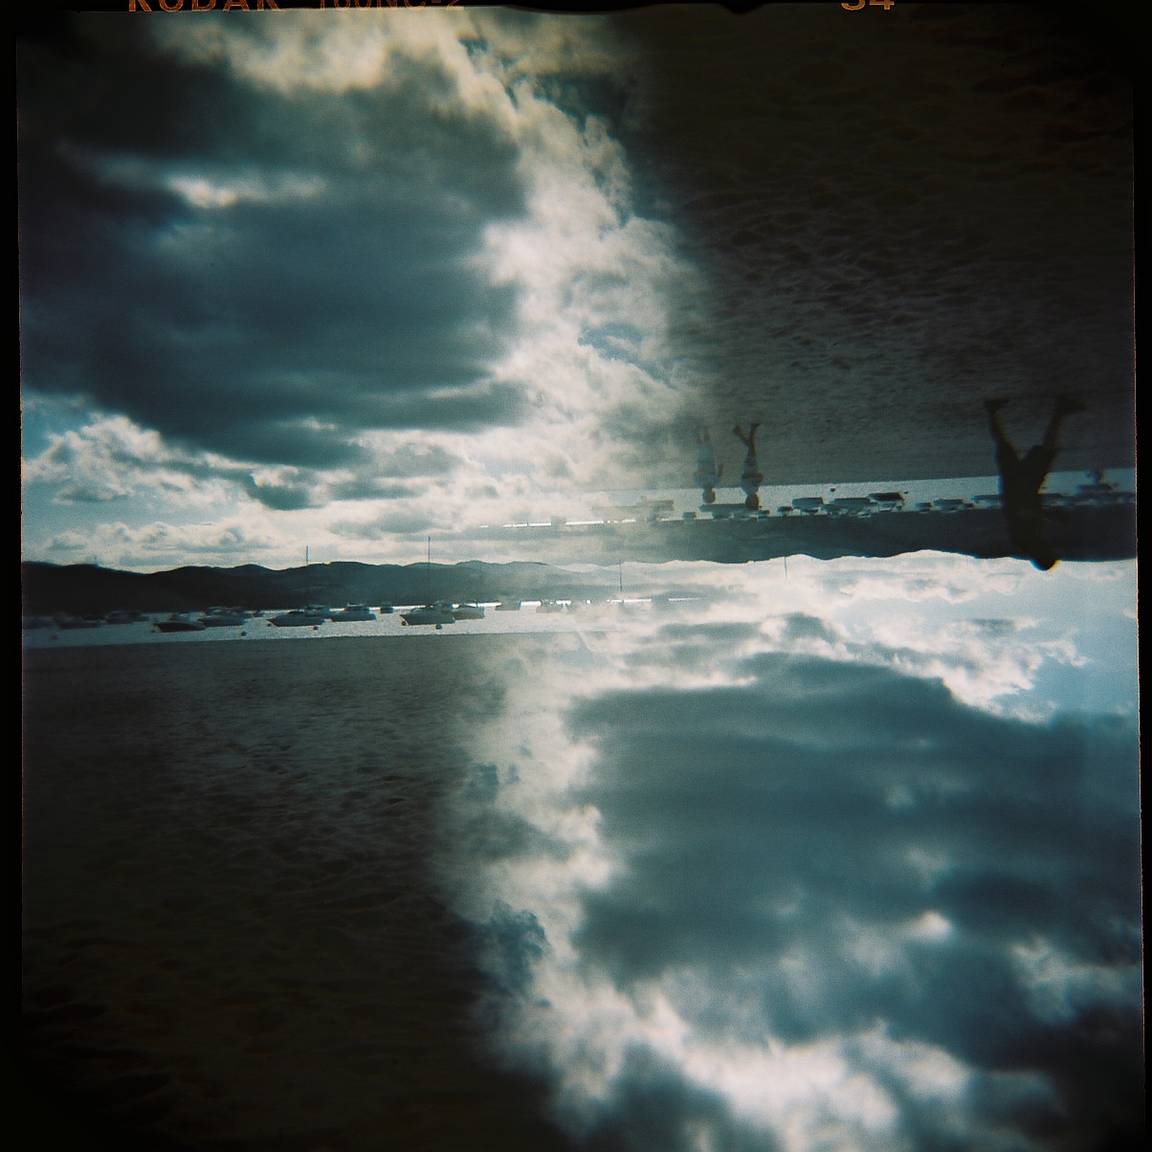
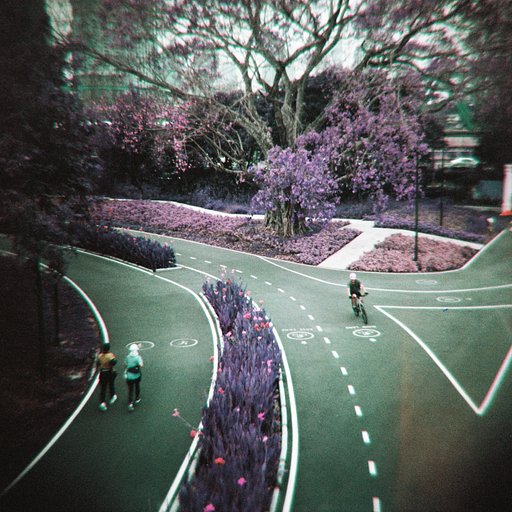
Once you’ve mastered this simple trick, you can start taking photos like these :

Have fun!
written by 5thdimension on 2011-02-21 #gear #tutorials #tipster #quickie-tipster #handicraft #diana-f-top-tipster


19 Comments